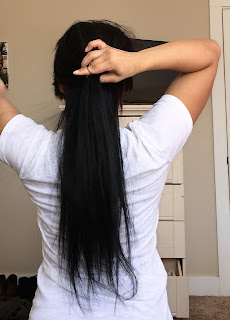
** Disclaimer: Don't mind my stubborn short layers in spots of this. I wear extensions and my natural hair isn't longer than my collar bones so sometimes my hair can get a little crazy in the middle of hairstyles **
WHAT YOU NEED:
- Brush
- Comb
- 2 Rubber Bands
- A few bobby pins
- Hairspray
STEPS:
- Brush your hair out. Make sure there are no kinks, knots, etc. The tip to any pretty braided hairstyle is smooth hair. It can be curly, straight, wavy, etc., but it needs to be smooth regardless.

- Take parts of hair on both sides of your head and put them in a hair up ponytail with your elastic in the middle of your head. Brush out your hair again after this step if need be.
- Take the hair in the ponytail, lift it up, and loop it through the part of your hair that's tied up, right on top of the elastic. It gives a really pretty, twisted effect.


- Pull the hair up and in front of your face (if you can braid behind your head, skip this step, and an extra gold star for you. I can, but my arms get way too tired) anyway, with the hair in the ponytail in front of your face, go ahead and start braiding. Just a regular braid is what we're looking for today. Keep the braid fairly loose. I made the mistake initially of braiding too tight, and it didn't look as rose-like in the end, even after I pulled apart the braid. Tie the end with an elastic when complete.

- Now this is my favorite part with braids- pulling them apart. It just gives the braid so much more life, and makes it more pretty. What you do is hold the main part of your braid with one hand, hold a section of one side of the braid with the other, and use that other hand to pull slightly at your braid. be careful in this step though, and take your time, because you can easily make the braid fall apart. Do this throughout your whole braid.


- Now that you have the braid all ready, start at the bottom of your braid, and make a circular shape with the braid all the way up to the top of where your braid begins. secure this with a bobby pin. I, surprisingly, only needed one, but you may need more depending on your hair type.


- Now check in the mirror, and see if the rose bun is secured enough, looks the way you want, etc. When it's up to your liking, secured enough, and ready to go, feel free to spray any parts of your hair for extra hold throughout your day.


No comments:
Post a Comment