Showing posts with label Hair. Show all posts

Sunday, March 12, 2017

Spring/Festival Season Updo

Hey guys ๐Ÿ˜Š How's everyone doing? Today's post I'm super excited about, because I looooved the
turnout. It's this EXREMELY EASY updo for spring/festival season/summertime, that literally needs one item: a headband- of your choice as well! It just needs to be able to be elastic around your whole head- that's really it though. This updo is also perfect for prom, weddings, or any other special occasions. Are you ready? Let's get started! Hope you guys like it as much as I do!

MATERIALS NEEDED:

  • Headband with an elastic around your head

The one I got was from Walmart for guess how much? 88 cents! Yeah, I got it on sale but I love it! It's so me with the gold.

OPTIONAL:
  • Bobby pins
  • Hairspray 
  • Curling iron - I didn't even curl my hair. You may want some bangs to frame your face to be curled though- totally your preference.
STEPS:
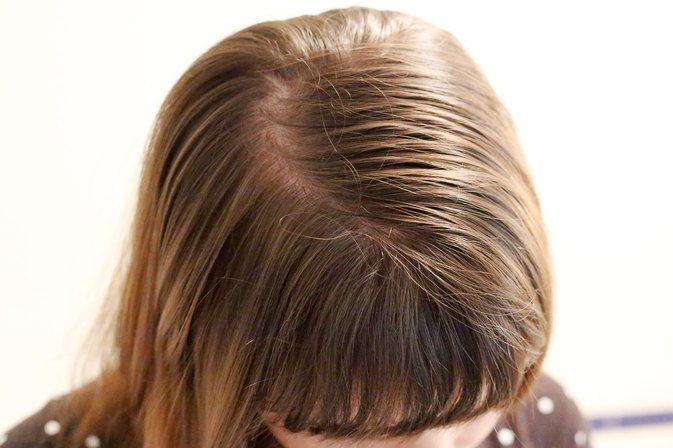
  1. Start with smooth, brushed out hair. It can be curled if you prefer, but you can leave it straight like I did just for time preservation.

    2. Put your headband in your hair- What you need to do with this part though, is not put it under your hair, like you would when wearing a normal headband. You'll put it over all of your hair.


    3. Grab a 1-1 & 1/2 inch section and twist it

4. Now here's the hardest step- which isn't even that hard. What your're going to do with this step is take that small section, and loop it around and tuck it in your headband like shown.


5. Now, if you have longer hair or extensions like I do, you'll have to repeat the last step from step 4 with the excess hair. 


6. Now, all you'll do is repeat these steps all over the rest of your head! You can take larger sections, smaller sections, whatever you desire! 

 Aaaand here you go! The finished product! It looks like a formal curled updo that took 82942 bobby pins! If you have any hairs out of place, you may need hairspray, or a bobby pin or 2 to tame a few stray hairs, but that's really it! It's such a pretty hairstyle that's totally worth trying.


Hope you all enjoyed! Let me know of any other hairstyles you want me to try! 

XOXO

Wednesday, March 8, 2017

How to dye your hair PROFESSIONALLY at HOME

    So, I am very stubborn in letting people do my hair or makeup. Nothing against any of you guys, I just really prefer to do both of those myself. With that, though, I don't want to harm my hair when I color it. I've tried many different brands, methods, etc., to dying your hair professionally at home, and I am here to give you guys my favorite products for hair coloring.
    So, some of you may think I am just going to be showing you guys box dye that you can get from the drugstore- but there are many other better hair dyes you can get from hair product supply stores that are a lot more beneficial not just in the health of your hair, but color payoff and longevity.

    CONS TO DRUGSTORE DYE:

  • Gives your hair a dry, straw-like texture and feeling
  • Only stains your hair. It doesn't actually penetrate into your strands- which only lets the color last for about one to two weeks and easily wash out. 
  • Constantly having to touch up your hair with box dye will make the price rack up- sure it's only 8-12 dollars today, but after dying your hair every couple weeks what's that going to add up to?
  • Dying your hair multiple times in a months time does awful damage to your hair. 
WHAT DO YOU NEED?

HAIR DYE

No, you cannot get professional hair dye from the drugstore. Professional hair dye is only sold at beauty or hair supply stores. I get my hair dye and the other needed items for hair coloring from Sally Beauty Supply. The closest one to where I live is about 40 minutes away, so it is an annoying drive, or I can order it online. The dye I use is from the L'Oreal HiColor line. I know- I was surprised when I found out L'Oreal had a professional line of hair products as well. But the reviews on this line are amazing! Blogs, YouTube, Pinterest, everywhere I read about this line, I read nothing but good comments. The best thing too? It's SO affordable! One tube of dye is about 6 dollars. The thickness in my hair is about average, and one tube works perfect for me. Now, my natural hair is only to my collarbones though. When/ if I dye my extensions, then I have to use two tubes. I have had my hair a bright red, a maroon, and now it's a blue black shade, and all those shades I used this line of hair dye. It has a variety of shades for you to choose from, and you can always mix shades. I would when I had the bright red in my hair. This line has yet to disappoint me in total honesty. My hair is never felt feeling dry after, and I was never dissatisfied with the color. And I have very stubborn, dry/ brittle hair that has a hard time grasping color. Enough with the rambling-moral of the story, I really recommend this dye.

PHOTOS OF DIFFERENT HAIR SHADES:


All three of my hair color changes were done with the L'Oreal HiColor line, and I love all three looks I've worn. My hair was naturally a dark brown/ off  black, and it had no problem grabbing the bright red dye, and holding it in my hair for a reasonable amount of time.

WHAT ELSE DO YOU NEED?

Developer

30 Volume Creme DeveloperDeveloper does just what it's called. It develops and activates the hair color. Developer can be purchased at Sally's as well. There are different levels of developer you can purchase, ranging from 10, 20, 30, or 40 volume, The higher the volume, the more lift will be provided in your hair, and the stronger color will be deposited. That being said , I typically go for 30 volume, This is the developer I use, and the price of developer ranges from 1.99- 5.39 currently depending on the size you purchase.


OTHER NECESSITIES:


  • Plastic gloves
  • Plastic cap
  • Plastic bowl
  • Mixing tool for the hairdye


Long Tail Bleach and Tint Brush
OPTIONAL:

  • Tint brush
  • Vaseline
  • Towel


STEPS:

  1. squeeze out the hair dye from the tube into your mixing bowl
  2. measure out 2.5 fl. oz. of developer and pour into the bowl (or eyeball the measurement like me)
  3. Mix the dye. Wanna know a trick? I just use the tail end of the tint brush to do the mixing. Just mix until you can tell the products have both meshed well together.
  4. Put on plastic gloves
  5. Apply hair dye in hair. For this, you can use the tint brush if your little heart desires, or you can just use your hands. Just PLEASE remember gloves- your hands WILL STAIN without them. I honestly get stained hands and nails anyway even with the gloves on. How? I have no idea, but you really need the gloves.
  6. After applied all throughout the hair, throw plastic cap on
  7. Wait for 20-40 minutes, depending on hair thickness, color grasp ability, and length. I personally wait about 30 minutes myself.
  8. Rinse out and condition hair when complete. Then style as desired.
TIPS:
  • Apply Vaseline to the outer edges of your face to prevent facial staining from the dye.
  • Wear an old t-shirt to prevent ruining newer ones with dye, or wrap a towel around the shoulders.
  • Wait until your hair is needing to be washed to dye your hair. When your hair is too clean, it doesn't have enough oils that will grip on to the dye as saturated as you want, and it will rinse out a lot easier. 
  • Apply oil to your hair after styling to prevent dry ends if needed.

So there you have it! My words of wisdom in professionally dying your hair at the comfort of your own home! I hope you'll be able to try this out, and you love the L'Oreal HiColor line as much as I do. Have a good one!

XOXO


Sunday, March 5, 2017

February Beauty Favorites

    Hi, lovelies! Today's post is going to be me giving you guys a roundup of all of my favorite beauty products I have tried that are new, or that I have rediscovered in the month of February. I watch a ton of beauty vloggers on YouTube, and these are one of my favorite videos to watch monthly, mainly because I'm nosy and like to see what everyone else uses in their daily beauty routines. I'll have a collection of hair, makeup, and skincare stuff to show you guys so hope you all enjoy!


    SKINCARE:
Photo of Aura Cacia Essential Oil, 100% Pure, Cleansing, Tea Tree, 0.5 fl oz (15 ml)    This month, I've had a constant problem with breakouts. I'm still trying to get my skin to completely calm down, but I found something that's been really helping me out in that process- tea tree oil. Using tea tree oil on breakouts has totally changed my skin, I use a q-tip and put on drop of the oil, along with a little water, and I just dab it over the breakout and literally within the next day, the breakout gets smaller, and it's typically totally shrunken by 3-4 days. The oil I got was just from Rite Aid. The brand itself is called Aura Cacia, and I was able to get it for like 7 bucks I think! For sure under 10, which for oils that's a steal!


Image result for belif the true cream moisturizing bomb     I redeemed this moisturizer from my Sephora Beauty Insider, and I'm soooo glad I did. It's the Belif True Cream Moisturizing Bomb. It's become my new night- routine moisturizer, and I can't rave enough about it. It leaves my skin so smooth and hydrated, and by the morning it literally just feels so soft. I'm not looking forward to when I run out and have to pay the full price for one, but a little goes a long way, and it's definitely worth every penny.


HAIR:
Image result for one n only argan oil curling iron   I only have one hair favorite, and it's this curling iron from the brand One n' Only. You can find their products and tools at Sally Beauty Supply. I got their 1 & 1/4 inch curling iron actually as a birthday gift from my parents (thanks mom and pops,) and I didn't get into really using it a lot until the past 3-4 weeks and I love it. It doesn't leave my hair dry, and the iron came with a sample size of their argon oil which is amazing as well. I also just love the curl it gives my hair. It's just a very natural wave, that doesn't totally flatten out by the end of the day. I love it!


 MAKEUP:

Image result for wet n wild megaglo contour stickMy first makeup favorite of the month is from Wet n Wild. I tried their new contour stick that launched at the beginning of the year, and I am soooo in love. It glides over the skin so smoothly, blends evenly, and gives your face such a natural contour for the most affordable prices! Wet n Wild can be purchased from their website, drugstores, and Ulta. Please do yourself a favor and check it out! A lot of their shades do have a warmer undertone though, and I'm very yellow- based undertone. So if you're cool toned, you may have to be careful in which shade you choose.


Image result for wet n wild photofocus powder


My next makeup favorite is from Wet n Wild as well. Their new face powders are a gift from above man. It's their photofocus pressed powder, that can be purchased at the same locations their contour stick can be purchased from. I use this to set my undereye area, and the oilier areas of my face. Such a great powder, I highly recommend this too!


 My last makeup favorite is from the brand Milani Cosmetics. It's another drugstore brand that can be purchased on their website, at Meijer, Target and CVS. This is their Amore Matte Lip Creme- and the shade I have been loooving is in the shade Covet. It's a true chocolate brown shade. The formula is amazing! If you've worn liquid lipsticks before, you know how drying some can be. This one isn't at all! It wears so comfortably on the lips, and wears for a relatively long time! Again, another affordable makeup item too that I very highly stand by.


And there you have it! Some of my favorite beauty items of the month. I hope to be able to do these as often as I can, whether that's every other month, or hopefully monthly! Thank you guys for reading, and I'll see you all soon! XOXO

Tuesday, February 28, 2017

How to Sustain Sleek, Shiny Hair

I love wearing my hair straight, but sometimes I feel like my hair can get kinda dull looking when I don't do much to it. So I've experimented with different ways to keep my hair shiny and lively, and that's what I'm sharing with you guys today! Now I'm not a hair professional (yet,) these are just things I do that help me with my hair, and hopefully one of these things will do the same for you ๐Ÿ˜Š I'm going to try to go in the basic order of hair care as well, so it's a little easier to follow along with!


 COLD WATER RINSE
I use a strengthening shampoo and conditioner because I have weak, brittle hair, but I am not going to get into the details of that. Let me know if you guys want a hair care routine, though! But, what I do in the shower and really recommend is rinsing out shampoo and conditioner in cold water. I'm not saying to take a completely cold shower. But, when it's time to rinse out the products, doing so when it's warm has benefits that I've seen firsthand myself. For one, it's less heat on your hair, and our hair needs as much of a break from the heat we put on it on the daily as it can get. Rinsing with cold water helps lock in the moisture, and with moisturized hair comes shiny hair. I've done this for months now, since I dyed my hair black, and can really tell a difference. It sucks to get use to, especially at first, but when you start noticing differences then you'll easily get use to it. 


HAIR OIL
I can preach about hair oils forever. They've honestly turned my hair around the past few years, as I come from very broken, damaged hair. Oil is great for shine as well, and it protects your hair from heat. Right out of the shower, dry your hair off with a towel, take a dime-sized amount of oil, and run it through the lower half of your hair. It will hydrate the hair as well, but make sure you don't use too much!


CERAMIC FLAT IRON
High Quality ceramic flat irons are typically more expensive, but have a great benefit on your hair. What ceramic irons are, are metal plates with a ceramic coating. The coating locks in the moisture, distributes the heat evenly, and locks in moisture as well. The coating protects your hair from the metal as well, which the hot metal plates alone can get to be way too hot for your hair, can make your hair snag or rip while straightening, and can cause frizziness. It's a lot healthier on your hair versus plain metal plates. The flat iron I use is a 1 & 1/4 inch flat iron from the brand Solia, which can be purchased from folica.com. It is more expensive, but lasts years. I believe in my six- seven years flat ironing my hair I've only gone through 2, and my mom always gives me her old flat irons, so I don't get them brand new (thanks momma.) But shows even more that they are a lot more durable and last a while. I'll list cheaper options below though, if you guys are interested!


SHINE SPRAY
Shine. Spray. Get it! I thought this would be a gimmick honestly, just because I thought oils gave enough shine to my hair, but I was wrong!! When I dyed my hair black, my goal was to make it a shiny blue-black that was blinding. So I did research and when everything I read or watched preached shine sprays, I rolled my eyes because I was convinced I was paying money for the same thing my oils did. But this one from garnier is a god send. I do one spritz on each side of my hair, wait for it to dry, then brush it out, and it gives this beautiful shine without giving my hair any oil. Which, even though I have dry hair, I can get oil buildup sometimes and that's the worst. BUT.... be sure to spray around 10-12 inches away from your hair. You don't want the spray sprayed in just one spot, because that will give a greasy appearance. What I've also began to do has been to spray a few in the air and walk in it, while covering my face so it doesn't get oily. Anyway, it works. And the spray I use is so cheap! I'll provide more options below though :)


DIY MASKS
If you guys read my post a week or so ago, you know I'm a sucker for face masks. Well guess what? I am for hair masks too. I'm not kidding, the natural kitchen products do wonders for your beauty routine. This one is perfect for shine. Here's another one I have for you guys:

DIY EGG, OLIVE OIL, AND HONEY HAIR MASK


MATERIALS NEEDED:                                              

  • 1 egg
  • 1 tbsp. olive oil
  • 1 tbsp. honey
  • Bowl
  • Measuring cups
  • Fork
  • Towel
  • Plastic gloves (optional)
  • Plastic cap for your head (optional)
STEPS:
  1.  Wrap the towel around your shoulders so you won't get anything on your clothes
  2. Crack the egg, and put in the bowl

  1. Measure out 1 tbsp. of olive oil, and put in the bowl.

  1. Measure out 1 tbsp. honey, and put into the bowl.

  1. Use the fork to mix the mask. This gives a really snot-like consistency when all mixed. I know, tasteful, right?

  1. Grab out and put on your plastic gloves if you have any, and apply this to JUST the ends and lower half of your hair at first. 
  2. Put on your plastic cap. 
  3. Let sit on your head for 50 minutes.
  4. After you've let this sink in your hair for 50 minutes, apply more to the top half of your head for 5-10 minutes, depending on how oily your hair can get. If you want to leave on the tops of your head for even less, be my guest. 
  5. Wash out when complete with your normal shampoo and conditioner. 
I tried this mask a few days ago and looooved it. It didn't leave my hair oily, but it really moisturized my hair and it had a lot more luminosity in it for days after as well! I also did this mask to my extensions as well, but only left on for 20 minutes.

And there you have it! Some of my tips on how to keep shiny, sleek hair. If you have any other tips you've done that you swear by, let me know! I'd love to hear it!

TIP:
**KNOWING THE DIFFERENCE BETWEEN SHINY HAIR AND OILY HAIR**

Related image
Shiny Hair


Hair Care Tips for Fine, Thin, Oily Hair
Oily hair

Shiny hair-yes. Oily hair-no. That's a given to most people, but what can get confusing to some is when they confuse healthy, shiny hair with oily hair.

Your hair is SHINY and HEALTHY when:

  • It provides a luminous kickback in the light.
  • It still is/feels clean while being luminous 
  • It has volume
  • When washed, it still has the same glow
Your hair is OILY when:
  • It's flat 
  • It's not clean feeling- can you smoothy run your fingers through the scalp and roots? If yes, it's clean. If not, it could probably use a good wash.
  • It provides shine, but not a glow. It's basically just when light is shone on your hear, your grease gets emphasized. 
It's important to note the differences in these, because if not you may be using incorrect or non beneficial products, thus won't help your hair. 


PRODUCTS USED/MENTIONED:

OIL:

 Ogx coconut oil & coconut milk (I used both):
https://www.ogxbeauty.com/hair/coconut-milk/?gclid=Cj0KEQiA0L_FBRDMmaCTw5nxm-ABEiQABn-VqSuWslsm86cym8S5Hhl9fAR-IDlip-KRGjJReEKa47gaAm9k8P8HAQ

Other options: 

Ogx argan/ moroccan oil
 http://www.vitacost.com/organix-extra-penetrating-moroccan-argan-oil-dry-course-hair?csrc=PPCADW-&mtp=sm0TUOzwZ-dc|pcrid|166837283959|&gclid=Cj0KEQiA0L_FBRDMmaCTw5nxm-ABEiQABn-VqYstvvodGTROeUM3qE1lK7polAu5Sy6WveIftnMz3u8aAiKF8P8HAQ

One n only argan oil:
 http://www.sallybeauty.com/argan-oil-treatment/SBS-539400,default,pd.html

FLAT IRON I USE:
Solia 1& 1/4" flat iron:
 http://www.folica.com/tools/flat-irons/solia-flat-iron-1

OTHER OPTIONS:
Remington S5500 Anti-Static Digital Ceramic 1" Flat Iron / Straightener

Straight by Revlon Ceramic Straightener, 1"


* can get both on Walmart website or in store if available.
**I haven't tried either of these irons, so I have no opinions on them. I just listed two more affordable options for ceramic flat irons if you didn't want to spend around 70 bucks on one. READ the REVIEWS and knowledge yourself first before making the choice to purchase any of these.Walmart also has a ton of other options for you to choose from as well.

FOLICA WEBSITE:

http://www.folica.com/

* Folica also has a lot of options of high quality ceramic irons to choose from.


Friday, February 24, 2017

Rose Inspired Half-Updo

Hi, everyone! Today's post is going to be a hair tutorial on how to get this rose inspired updo. I've seen this all over social media the past few weeks to a month or so, and I looove roses so I was crazy intrigued. And when I tried it myself and realized how simple it really was, I was even more in love. This is perfect for the spring and summer months coming up- weddings, graduations, prom, or just for a casual daytime look. Hope you guys enjoy๐Ÿ˜Š

** Disclaimer: Don't mind my stubborn short layers in spots of this. I wear extensions and my natural hair isn't longer than my collar bones so sometimes my hair can get a little crazy in the middle of hairstyles **


// @caitiepatricia: Cutest and Most Beautiful Homecoming Hairstyles ★ See more: http://glaminati.com/homecoming-hairstyles-medium-long-hair/:


WHAT YOU NEED:
  • Brush
  • Comb
  • 2 Rubber Bands 
  • A few bobby pins
  • Hairspray 
STEPS:

  • Brush your hair out. Make sure there are no kinks, knots, etc. The tip to any pretty braided hairstyle is smooth hair. It can be curly, straight, wavy, etc., but it needs to be smooth regardless. 


  • Take parts of hair on both sides of your head and put them in a hair up ponytail with your elastic in the middle of your head. Brush out your hair again after this step if need be.


  • Take the hair in the ponytail, lift it up, and loop it through the part of your hair that's tied up, right on top of the elastic. It gives a really pretty, twisted effect.


  • Pull the hair up and in front of your face (if you can braid behind your head, skip this step, and an extra gold star for you. I can, but my arms get way too tired) anyway, with the hair in the ponytail in front of your face, go ahead and start braiding. Just a regular braid is what we're looking for today. Keep the braid fairly loose. I made the mistake initially of braiding too tight, and it didn't look as rose-like in the end, even after I pulled apart the braid. Tie the end with an elastic when complete.


  • Now this is my favorite part with braids- pulling them apart. It just gives the braid so much more life, and makes it more pretty. What you do is hold the main part of your braid with one hand, hold a section of one side of the braid with the other, and use that other hand to pull slightly at your braid. be careful in this step though, and take your time, because you can easily make the braid fall apart. Do this throughout your whole braid. 


  • Now that you have the braid all ready, start at the bottom of your braid, and make a circular shape with the braid all the way up to the top of where your braid begins. secure this with a bobby pin. I, surprisingly, only needed one, but you may need more depending on your hair type. 


  • Now check in the mirror, and see if the rose bun is secured enough, looks the way you want, etc. When it's up to your liking, secured enough, and ready to go, feel free to spray any parts of your hair for extra hold throughout your day. 

ALL DONE! Not too hard right? I did have to try this style on my own a few times before I got the style I wanted, so don't get discouraged. I hope you guys enjoy this rose bun this spring and summer :) Have a great weekend, and let me know what you guys want to see next! 

d
XOXO