So, some of you may think I am just going to be showing you guys box dye that you can get from the drugstore- but there are many other better hair dyes you can get from hair product supply stores that are a lot more beneficial not just in the health of your hair, but color payoff and longevity.
CONS TO DRUGSTORE DYE:
- Gives your hair a dry, straw-like texture and feeling
- Only stains your hair. It doesn't actually penetrate into your strands- which only lets the color last for about one to two weeks and easily wash out.
- Constantly having to touch up your hair with box dye will make the price rack up- sure it's only 8-12 dollars today, but after dying your hair every couple weeks what's that going to add up to?
- Dying your hair multiple times in a months time does awful damage to your hair.
WHAT DO YOU NEED?
HAIR DYE
No, you cannot get professional hair dye from the drugstore. Professional hair dye is only sold at beauty or hair supply stores. I get my hair dye and the other needed items for hair coloring from Sally Beauty Supply. The closest one to where I live is about 40 minutes away, so it is an annoying drive, or I can order it online. The dye I use is from the L'Oreal HiColor line. I know- I was surprised when I found out L'Oreal had a professional line of hair products as well. But the reviews on this line are amazing! Blogs, YouTube, Pinterest, everywhere I read about this line, I read nothing but good comments. The best thing too? It's SO affordable! One tube of dye is about 6 dollars. The thickness in my hair is about average, and one tube works perfect for me. Now, my natural hair is only to my collarbones though. When/ if I dye my extensions, then I have to use two tubes. I have had my hair a bright red, a maroon, and now it's a blue black shade, and all those shades I used this line of hair dye. It has a variety of shades for you to choose from, and you can always mix shades. I would when I had the bright red in my hair. This line has yet to disappoint me in total honesty. My hair is never felt feeling dry after, and I was never dissatisfied with the color. And I have very stubborn, dry/ brittle hair that has a hard time grasping color. Enough with the rambling-moral of the story, I really recommend this dye.
PHOTOS OF DIFFERENT HAIR SHADES:


All three of my hair color changes were done with the L'Oreal HiColor line, and I love all three looks I've worn. My hair was naturally a dark brown/ off black, and it had no problem grabbing the bright red dye, and holding it in my hair for a reasonable amount of time.
WHAT ELSE DO YOU NEED?
Developer
 Developer does just what it's called. It develops and activates the hair color. Developer can be purchased at Sally's as well. There are different levels of developer you can purchase, ranging from 10, 20, 30, or 40 volume, The higher the volume, the more lift will be provided in your hair, and the stronger color will be deposited. That being said , I typically go for 30 volume, This is the developer I use, and the price of developer ranges from 1.99- 5.39 currently depending on the size you purchase.
OTHER NECESSITIES:
- Plastic gloves
- Plastic cap
- Plastic bowl
- Mixing tool for the hairdye

- Tint brush
- Vaseline
- Towel
STEPS:
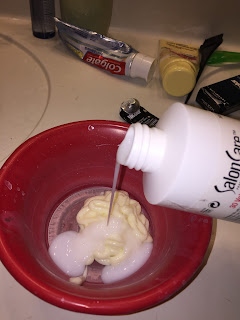
- squeeze out the hair dye from the tube into your mixing bowl


- measure out 2.5 fl. oz. of developer and pour into the bowl (or eyeball the measurement like me)
- Mix the dye. Wanna know a trick? I just use the tail end of the tint brush to do the mixing. Just mix until you can tell the products have both meshed well together.


- Put on plastic gloves
- Apply hair dye in hair. For this, you can use the tint brush if your little heart desires, or you can just use your hands. Just PLEASE remember gloves- your hands WILL STAIN without them. I honestly get stained hands and nails anyway even with the gloves on. How? I have no idea, but you really need the gloves.
- After applied all throughout the hair, throw plastic cap on
- Wait for 20-40 minutes, depending on hair thickness, color grasp ability, and length. I personally wait about 30 minutes myself.
- Rinse out and condition hair when complete. Then style as desired.


TIPS:
- Apply Vaseline to the outer edges of your face to prevent facial staining from the dye.
- Wear an old t-shirt to prevent ruining newer ones with dye, or wrap a towel around the shoulders.
- Wait until your hair is needing to be washed to dye your hair. When your hair is too clean, it doesn't have enough oils that will grip on to the dye as saturated as you want, and it will rinse out a lot easier.
- Apply oil to your hair after styling to prevent dry ends if needed.
So there you have it! My words of wisdom in professionally dying your hair at the comfort of your own home! I hope you'll be able to try this out, and you love the L'Oreal HiColor line as much as I do. Have a good one!
XOXO
No comments:
Post a Comment