Tuesday, February 28, 2017

How to Sustain Sleek, Shiny Hair

I love wearing my hair straight, but sometimes I feel like my hair can get kinda dull looking when I don't do much to it. So I've experimented with different ways to keep my hair shiny and lively, and that's what I'm sharing with you guys today! Now I'm not a hair professional (yet,) these are just things I do that help me with my hair, and hopefully one of these things will do the same for you 😊 I'm going to try to go in the basic order of hair care as well, so it's a little easier to follow along with!


 COLD WATER RINSE
I use a strengthening shampoo and conditioner because I have weak, brittle hair, but I am not going to get into the details of that. Let me know if you guys want a hair care routine, though! But, what I do in the shower and really recommend is rinsing out shampoo and conditioner in cold water. I'm not saying to take a completely cold shower. But, when it's time to rinse out the products, doing so when it's warm has benefits that I've seen firsthand myself. For one, it's less heat on your hair, and our hair needs as much of a break from the heat we put on it on the daily as it can get. Rinsing with cold water helps lock in the moisture, and with moisturized hair comes shiny hair. I've done this for months now, since I dyed my hair black, and can really tell a difference. It sucks to get use to, especially at first, but when you start noticing differences then you'll easily get use to it. 


HAIR OIL
I can preach about hair oils forever. They've honestly turned my hair around the past few years, as I come from very broken, damaged hair. Oil is great for shine as well, and it protects your hair from heat. Right out of the shower, dry your hair off with a towel, take a dime-sized amount of oil, and run it through the lower half of your hair. It will hydrate the hair as well, but make sure you don't use too much!


CERAMIC FLAT IRON
High Quality ceramic flat irons are typically more expensive, but have a great benefit on your hair. What ceramic irons are, are metal plates with a ceramic coating. The coating locks in the moisture, distributes the heat evenly, and locks in moisture as well. The coating protects your hair from the metal as well, which the hot metal plates alone can get to be way too hot for your hair, can make your hair snag or rip while straightening, and can cause frizziness. It's a lot healthier on your hair versus plain metal plates. The flat iron I use is a 1 & 1/4 inch flat iron from the brand Solia, which can be purchased from folica.com. It is more expensive, but lasts years. I believe in my six- seven years flat ironing my hair I've only gone through 2, and my mom always gives me her old flat irons, so I don't get them brand new (thanks momma.) But shows even more that they are a lot more durable and last a while. I'll list cheaper options below though, if you guys are interested!


SHINE SPRAY
Shine. Spray. Get it! I thought this would be a gimmick honestly, just because I thought oils gave enough shine to my hair, but I was wrong!! When I dyed my hair black, my goal was to make it a shiny blue-black that was blinding. So I did research and when everything I read or watched preached shine sprays, I rolled my eyes because I was convinced I was paying money for the same thing my oils did. But this one from garnier is a god send. I do one spritz on each side of my hair, wait for it to dry, then brush it out, and it gives this beautiful shine without giving my hair any oil. Which, even though I have dry hair, I can get oil buildup sometimes and that's the worst. BUT.... be sure to spray around 10-12 inches away from your hair. You don't want the spray sprayed in just one spot, because that will give a greasy appearance. What I've also began to do has been to spray a few in the air and walk in it, while covering my face so it doesn't get oily. Anyway, it works. And the spray I use is so cheap! I'll provide more options below though :)


DIY MASKS
If you guys read my post a week or so ago, you know I'm a sucker for face masks. Well guess what? I am for hair masks too. I'm not kidding, the natural kitchen products do wonders for your beauty routine. This one is perfect for shine. Here's another one I have for you guys:

DIY EGG, OLIVE OIL, AND HONEY HAIR MASK


MATERIALS NEEDED:                                              

  • 1 egg
  • 1 tbsp. olive oil
  • 1 tbsp. honey
  • Bowl
  • Measuring cups
  • Fork
  • Towel
  • Plastic gloves (optional)
  • Plastic cap for your head (optional)
STEPS:
  1.  Wrap the towel around your shoulders so you won't get anything on your clothes
  2. Crack the egg, and put in the bowl

  1. Measure out 1 tbsp. of olive oil, and put in the bowl.

  1. Measure out 1 tbsp. honey, and put into the bowl.

  1. Use the fork to mix the mask. This gives a really snot-like consistency when all mixed. I know, tasteful, right?

  1. Grab out and put on your plastic gloves if you have any, and apply this to JUST the ends and lower half of your hair at first. 
  2. Put on your plastic cap. 
  3. Let sit on your head for 50 minutes.
  4. After you've let this sink in your hair for 50 minutes, apply more to the top half of your head for 5-10 minutes, depending on how oily your hair can get. If you want to leave on the tops of your head for even less, be my guest. 
  5. Wash out when complete with your normal shampoo and conditioner. 
I tried this mask a few days ago and looooved it. It didn't leave my hair oily, but it really moisturized my hair and it had a lot more luminosity in it for days after as well! I also did this mask to my extensions as well, but only left on for 20 minutes.

And there you have it! Some of my tips on how to keep shiny, sleek hair. If you have any other tips you've done that you swear by, let me know! I'd love to hear it!

TIP:
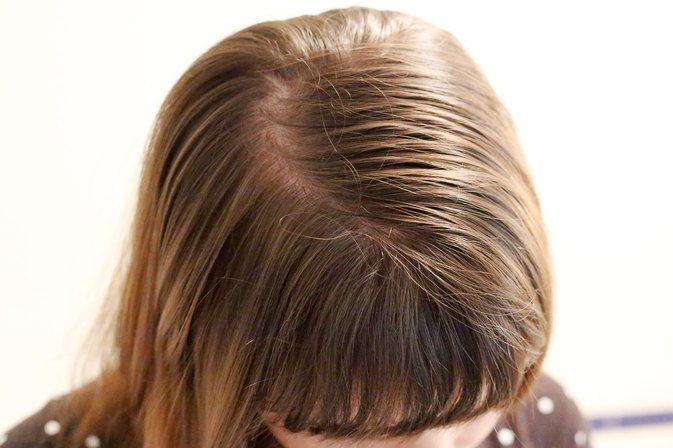
**KNOWING THE DIFFERENCE BETWEEN SHINY HAIR AND OILY HAIR**

Related image
Shiny Hair


Hair Care Tips for Fine, Thin, Oily Hair
Oily hair

Shiny hair-yes. Oily hair-no. That's a given to most people, but what can get confusing to some is when they confuse healthy, shiny hair with oily hair.

Your hair is SHINY and HEALTHY when:

  • It provides a luminous kickback in the light.
  • It still is/feels clean while being luminous 
  • It has volume
  • When washed, it still has the same glow
Your hair is OILY when:
  • It's flat 
  • It's not clean feeling- can you smoothy run your fingers through the scalp and roots? If yes, it's clean. If not, it could probably use a good wash.
  • It provides shine, but not a glow. It's basically just when light is shone on your hear, your grease gets emphasized. 
It's important to note the differences in these, because if not you may be using incorrect or non beneficial products, thus won't help your hair. 


PRODUCTS USED/MENTIONED:

OIL:

 Ogx coconut oil & coconut milk (I used both):
https://www.ogxbeauty.com/hair/coconut-milk/?gclid=Cj0KEQiA0L_FBRDMmaCTw5nxm-ABEiQABn-VqSuWslsm86cym8S5Hhl9fAR-IDlip-KRGjJReEKa47gaAm9k8P8HAQ

Other options: 

Ogx argan/ moroccan oil
 http://www.vitacost.com/organix-extra-penetrating-moroccan-argan-oil-dry-course-hair?csrc=PPCADW-&mtp=sm0TUOzwZ-dc|pcrid|166837283959|&gclid=Cj0KEQiA0L_FBRDMmaCTw5nxm-ABEiQABn-VqYstvvodGTROeUM3qE1lK7polAu5Sy6WveIftnMz3u8aAiKF8P8HAQ

One n only argan oil:
 http://www.sallybeauty.com/argan-oil-treatment/SBS-539400,default,pd.html

FLAT IRON I USE:
Solia 1& 1/4" flat iron:
 http://www.folica.com/tools/flat-irons/solia-flat-iron-1

OTHER OPTIONS:
Remington S5500 Anti-Static Digital Ceramic 1" Flat Iron / Straightener

Straight by Revlon Ceramic Straightener, 1"


* can get both on Walmart website or in store if available.
**I haven't tried either of these irons, so I have no opinions on them. I just listed two more affordable options for ceramic flat irons if you didn't want to spend around 70 bucks on one. READ the REVIEWS and knowledge yourself first before making the choice to purchase any of these.Walmart also has a ton of other options for you to choose from as well.

FOLICA WEBSITE:

http://www.folica.com/

* Folica also has a lot of options of high quality ceramic irons to choose from.


Friday, February 24, 2017

Rose Inspired Half-Updo

Hi, everyone! Today's post is going to be a hair tutorial on how to get this rose inspired updo. I've seen this all over social media the past few weeks to a month or so, and I looove roses so I was crazy intrigued. And when I tried it myself and realized how simple it really was, I was even more in love. This is perfect for the spring and summer months coming up- weddings, graduations, prom, or just for a casual daytime look. Hope you guys enjoy😊

** Disclaimer: Don't mind my stubborn short layers in spots of this. I wear extensions and my natural hair isn't longer than my collar bones so sometimes my hair can get a little crazy in the middle of hairstyles **


// @caitiepatricia: Cutest and Most Beautiful Homecoming Hairstyles ★ See more: http://glaminati.com/homecoming-hairstyles-medium-long-hair/:


WHAT YOU NEED:
  • Brush
  • Comb
  • 2 Rubber Bands 
  • A few bobby pins
  • Hairspray 
STEPS:

  • Brush your hair out. Make sure there are no kinks, knots, etc. The tip to any pretty braided hairstyle is smooth hair. It can be curly, straight, wavy, etc., but it needs to be smooth regardless. 


  • Take parts of hair on both sides of your head and put them in a hair up ponytail with your elastic in the middle of your head. Brush out your hair again after this step if need be.


  • Take the hair in the ponytail, lift it up, and loop it through the part of your hair that's tied up, right on top of the elastic. It gives a really pretty, twisted effect.


  • Pull the hair up and in front of your face (if you can braid behind your head, skip this step, and an extra gold star for you. I can, but my arms get way too tired) anyway, with the hair in the ponytail in front of your face, go ahead and start braiding. Just a regular braid is what we're looking for today. Keep the braid fairly loose. I made the mistake initially of braiding too tight, and it didn't look as rose-like in the end, even after I pulled apart the braid. Tie the end with an elastic when complete.


  • Now this is my favorite part with braids- pulling them apart. It just gives the braid so much more life, and makes it more pretty. What you do is hold the main part of your braid with one hand, hold a section of one side of the braid with the other, and use that other hand to pull slightly at your braid. be careful in this step though, and take your time, because you can easily make the braid fall apart. Do this throughout your whole braid. 


  • Now that you have the braid all ready, start at the bottom of your braid, and make a circular shape with the braid all the way up to the top of where your braid begins. secure this with a bobby pin. I, surprisingly, only needed one, but you may need more depending on your hair type. 


  • Now check in the mirror, and see if the rose bun is secured enough, looks the way you want, etc. When it's up to your liking, secured enough, and ready to go, feel free to spray any parts of your hair for extra hold throughout your day. 

ALL DONE! Not too hard right? I did have to try this style on my own a few times before I got the style I wanted, so don't get discouraged. I hope you guys enjoy this rose bun this spring and summer :) Have a great weekend, and let me know what you guys want to see next! 

d
XOXO

Tuesday, February 21, 2017

Hand Makeup- The Newest Trend for Makeup Artists

  We're all use to eyeshadow being applied and worn on our eyes right? Well, recently that hasn't been enough for makeup fanatics like me, and doing eye makeup on different parts of our bodies like our arms and legs and posting to social media have really become popular. Crazier yet, sometimes artists will create on legs too if they need a larger canvas. I call it 'arm candy' on my instagram page whenever I post a picture of my arm/ hand makeup looks. It's kinda different to get the hang of at first after being so use to creating on your eyelids, I'm not going to lie, but after you do, you never want to stop creating looks of all different colors and techniques! I'm going to walk you guys through the steps on creating eye looks on your hands, so you can create beautiful arm candy too!!


  • STEPS:
         1) Start with the brows. What color you want the brows to be?  Blonde? Brunette? Black? Pink? Whatever color, start with a brow powder or eyeshadow of that shade you've chosen and make a general shape of an eyebrow. Notice how I just did a really light sketch of the brow, I dipped my brush in the powder once, and used a light pressure to make the brow shape. Try to avoid being heavy handed with this step as possible. This is just a nice base, and we will get into more of the detail work in the next step :)
  

        2) Now, take either a darker eyeshadow shade, an eyeliner, thin eyebrow pencil or pomade, and draw mini hair-like strokes to mimic actual brow hair. Use as small detailed of a brush as you can to do this step. Think about it- strands of hair are incredibly thin, and we're trying to make this as realistic as possible. Be sure to use a light pressure when pressing your brush onto the skin when doing this step as well.
.

       3) Okay, so now that we have the brows all squared away, now time to get to shaping the actual eye. Today, we're starting with a closed eye, I'll make a post soon on how to achieve an opened eye look. 😊 First though, we're going to prime the 'lid' area for the highest color payoff and quality of eyeshadows. Use whatever your heart desires for this- I honestly just use concealer to prime my actual eyelid everyday, so that's just what I used. Use what you trust!
            For the eye shaping, I suggest taking an angeled brush with a light brown eyeshadow, brow color, etc. Think of the color of your skin, and how the contours of your face are maybe a shade or two darker than the main part of your skin. Thats's the shade you want this to be, because that's what we're recreating. Be sure to draw the base of the lashline, the crease, and do a tiny bit of shading on the inner and outer contours of the lid if need be. If you need to, google a picture of a closed eye to reference to. It helps alot! Do that with the brows too!


       4) Now time for the eyeshadow. And for this, really not much is different. The same rules for eyeshadow on your actual eye apply for your hand. Blend the shadow as much as you can! Apply shadow then blend until you get the desired definition and blend that you want.


This makeup look was a halo smokey eye that I made using the Morphe 25 B (Bronzed Mocha) palette. I decided not to show the exact eyeshadow steps in this post, because I wanted to focus on the technique of recreating the actual eye. If you want the steps on exactly what I did and what brushes I used, feel free to let me know!


       5) Liner and lashes. Just like on your lids, liner and lashes can make or break the look. What I use for the liner and lashes is just eyeliner. Liquid eyeliner gives the most ease and smoothest application in my personal opinion from experience- but any type of eyeliner will do. For the lashes, apply the same technique as for the brow hairs, mimicked lash hair is what we're looking for. Just with the lashes, make the strands a little longer. And a subtle flick a the ends for a curl in the lashes doesn't hurt either :)


SOME HELPFUL TIPS:

-Small detailed brushes are key. These small brushes are the ones I use for the brows, and these eyeliners have the best tipped applicators for precision

-Pay attention to detail. Like mentioned earlier, pictures of actual eyes can help you out tremendously with the contours of the eye and the brows. 

-In case I haven't mentioned yet, Did I say it's important yet to blend your shadows?

And that's it!! Such a unique way to apply eyeshadow and something different to change things up. I would love to see if you guys have tried this, so show me your looks!

 PRODUCTS USED:
  • Brows: Salon Perfect brow palette  & Anastasia Beverly Hills dip brow pomade in ebony
  • Concealer: Maybelline Master Conceal in light/medium
  • Eyeshadow: Morphe Brushes 25 B palette
  • Liner/lashes: Wet N Wild megalast liquid Liner

BRUSHES USED:

  • Anastasia Angled #7 Brush
  • Eco Tools Angled Brush
  • Craft Store detailed brushes
  • Elf, Eco Tools, Urban Decay, and Royal & Langnickel eyeshadow brushes for eyeshadow blending


Enjoy, Beauties!
XOXO

Saturday, February 18, 2017

DIY Brightening Face Mask

   Happy Sunday, Everyone! So I don't know about any of you guys, but I absolutely love doing face masks. They're such an easy way to pamper yourself, but more importantly, they nourish your skin with amazing ingredients, which we can never get enough of. On the negative side though, when you're on a budget, skin care items can get to be really expensive- even items you can purchase at the drugstore- it all adds up. One of the ways I've been able to keep up on my skincare while not breaking my bank account has been to make my own face mask out of all natural, and common household items. Some might think it's crazy, but believe it or not, a lot of the beauty items we use on the daily such as cleansers, moisturizers, creams, oils, shampoos, conditioners, etc., tend to have natural ingredients in them that we may have in our house. Baking soda, Coconut oil, lemons, sea salt, avocado, the list goes on and on. I could make a separate post on all the different benefits each item has on your skin, but today, we're going to focus on mainly lemon and honey. I'm going to give you guys the steps to take and everything you need, and you're going to find out sooner rather than later how actually easy it is!

     Today's face mask is going to focus on brightening your skin. I tend to have very dull, tired looking skin that can always use a good pick-me-up. And lemon and honey are notorious for giving your skin a bright, radiant (but not oily,) and clean glow. Lemons are rich in Vitamin C and citric acid, which over time can really make a difference on brightening the skin. Vitamin C can also lighten specific dark spots on the skin or throughout your whole body like age spots, sun spots, or scars. As a plus as well, lemons are great at reducing and removing excess oil on the skin, and that's due to the citric acid on the skin. Now let's get into the honey. Other than being a great sidekick to peanut butter, it has a number of benefits to your skin also. Honey is great to moisturize and soothe the skin, which mixed with the lemon that brightens, the honey then gives the clean, radiant glow. Honey is also a natural antibiotic, which makes it great for clearing problematic, acne-prone skin. Do you believe me now? Today's mask is gonna take no time, as the hardest part of the whole process is literally making sure you have the items you need.


  •  MATERIALS NEEDED: 

-Lemon
-Honey
-Flour
-1 egg
-1 bowl
-measuring cups
-fork
OPTIONAL: foundation brush

  •    STEPS: 


 1) Cut your lemon in half


2) Measure out 2 teaspoons of the lemon juice by squeezing your lemon and putting the juice into the measuring cup, and dump into the bowl.


3)Measure out 2 teaspoons of honey into the measuring cup, and dump into the bowl.


4) Crack your egg and dump into the bowl


 5) Measure out 1 tablespoon of flour and pour into your bowl


  6) Use your fork to mix all the items together. When mixed, you should get a liquidy- paste consistency.


  7) With your foundation brush if you have one, or your fingers work fine too, apply the mask all over your face. Be sure to apply a generous amount to specific areas you want to really get that brightening effect.


  8) Let sit on your face until it dries. For me, it didn't take longer than around 10-15 minutes to dry all over my face.

 9) Wash off. I started off with just water and massaging it into my face, but eventually I used a gentle face wash to scrub the rest off.

10) Then viola! Your newly fresh, glowy, and bright skin. The results are instant too and I know you'll be amazed by the difference in your skin. Let me know if any of you guys have tried this mask and what your thoughts are :) Also, let me know what else you guys wanna see me try!

XOXO